

Last Updated: November 2, 2026
Quick Summary
To ship solid wood furniture safely, photograph every surface and flaw first, then disassemble protruding parts and pack in layers: stretch wrap against moisture, foam on corners, moving blankets, and a double-wall cardboard or wooden crate outer layer. Choose freight for heavy or crated pieces and parcel for small light items, and note any damage on the delivery receipt before signing.
- Photograph six angles per piece plus close-ups of existing flaws before wrapping anything.
- Bag hardware separately, label each bag, and tape it to the furniture's underside.
- Build or buy a crate leaving a 5 cm cushioning gap on every side, filled with foam or blankets.
- Standard carrier liability is often capped low, so declared value or third-party insurance covers the gap.
- Measure the crate at its widest point and photograph the loaded pallet before the driver signs.
Table of Contents
- What You'll Need Before You Ship Solid Wood Furniture
- Step 1: Photograph and Document Every Piece
- Step 2: Disassemble and Protect Vulnerable Parts
- Step 3: Choose the Best Packing Materials for Wood Furniture
- Step 4: How to Crate Furniture for Shipping
- Step 5: Freight vs Parcel Shipping for Furniture
- Step 6: Measure, Weigh, and Prepare Freight Documents
- Step 7: Inspect on Delivery and Handle Claims
- Frequently Asked Questions
What You'll Need Before You Ship Solid Wood Furniture
Learning how to ship solid wood furniture safely starts with accepting one fact: wood moves. It expands and contracts with humidity, and a piece that leaves your home in perfect condition can arrive with a cracked joint if it spends three days in an unheated trailer.
Before you touch a roll of tape, confirm your piece is genuinely solid wood rather than veneer over particle board. If you are unsure which you own, solid wood vs particle board furniture: 2026 guide explains how to tell them apart before you commit to a packing method.
Gather these supplies first so you are not hunting for tape mid-wrap:
- Nitrile gloves and a clean microfiber cloth
- Camera or phone for documentation
- Screwdriver set and labelled zip bags for hardware
- Furniture blankets, foam sheets, and stretch wrap
- Double-wall cardboard, corner protectors, and strapping tape
- A tape measure and a bathroom scale
Step 1: Photograph and Document Every Piece
Photograph every surface, joint, and existing flaw before anything gets wrapped. Clear, dated photos are the only evidence a carrier will accept when you file a damage claim, and most disputes are lost because the shipper cannot prove the piece left in good condition.
Shoot in consistent light and cover six angles per piece: front, back, both sides, top, and underside. Capture close-ups of any existing scratch, ding, or loose joint, then note the condition in writing. Photograph the hardware laid out on a plain surface before bagging it.
A short video walkaround can also help document pre-existing condition alongside still photos.
Step 2: Disassemble and Protect Vulnerable Parts
Remove legs, knobs, handles, and any hardware that protrudes, then bag each piece's fasteners separately and tape the bag to the underside of the furniture.
Wrap detached legs individually in foam or a blanket before packing them alongside the main body. Never let bare wood touch bare wood in transit.
Watch out: over-tightening screws when you reassemble at the destination is how solid wood splits at the joint. Snug is enough; the wood needs room to move.
Step 3: Choose the Best Packing Materials for Wood Furniture
Packing solid wood furniture typically uses a layered system rather than a single product. If you are weighing whether to buy handcrafted wood pieces in the first place, this guide to is handcrafted wood home decor worth buying online can help you evaluate them before you pack.
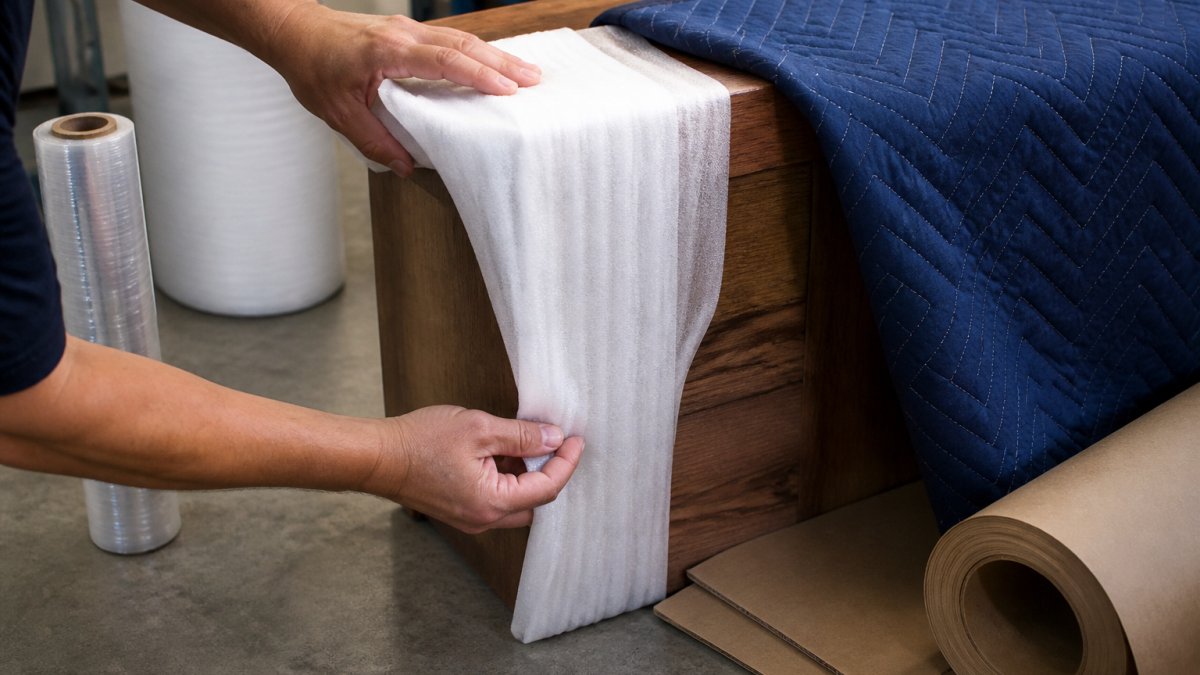
Wrapping, Padding, and Cushioning Layers
Work from the surface outward. A practical sequence looks like this:
- Wipe the piece clean and dry so grit does not grind under the wrap. Let any recently applied wax or oil fully cure first; trapping an uncured finish under plastic can leave a gummy haze.
- Wrap the whole item in stretch or shrink wrap to seal out moisture. Use a breathable furniture blanket or moving pad as the first contact layer on fine finishes, then the plastic over it, so the plastic does not sit directly against a fresh or soft finish.
- Apply foam sheets over corners, edges, and any carved detail. Closed-cell foam is the safer choice against a finish because it does not hold water the way an open-cell sponge can.
- Pad with moving blankets, taping them so they cannot shift.
- Finish with a cardboard outer layer, taped at every seam.
Bubble wrap works well for small, light items, but heavy furniture compresses it flat. Use foam and blankets where weight is the issue. Doubling corner protection on pieces with a visible corner joint can help, since impact often concentrates there.
Solid-Wood-Specific Risks: Humidity, Temperature, and Wood Movement
Solid wood is hygroscopic: it takes on and gives off moisture until it reaches equilibrium with the surrounding air, and it swells across the grain as humidity rises and shrinks as it falls (Indoor Wood Shrinkage and Expansion).
- Seal the piece against sudden moisture uptake with the plastic layer, but leave a small vent or avoid a fully airtight seal on a piece that is still acclimatising; trapped humid air inside a sealed wrap is its own problem.
- Keep the piece out of direct sun and away from a trailer's metal floor, which can transmit heat and cold. A cardboard or foam base layer insulates the wood from the floor.
- Do not pack a piece straight from a cold garage into a warm wrap session; let it sit at room temperature first so condensation does not form under the plastic.
- If the destination is much drier or more humid than the origin, plan to let the piece acclimatise indoors for several days before assembly, and tell the recipient so they do not force a swollen drawer or a shrunken joint.
Watch out: sealing a damp piece in plastic is worse than leaving it unwrapped, because the moisture has nowhere to go and can cloud a finish or encourage mildew on the wood and padding.
Matching Materials to the Piece
A few practical pairings save money and risk. A small, light accent table travels fine in double-wall cardboard with corner protectors and a blanket. A heavy dining table or a piece with a delicate inlay needs a crate or a blanket-wrapped pallet, not a box. Antique or high-value pieces justify a custom crate and a moving blanket inside it. Whatever the outer layer, the inner layers should stop bare wood from touching bare wood, stop the piece from sliding, and keep moisture from reaching the finish.
Step 4: How to Crate Furniture for Shipping
To crate furniture for shipping, build or buy a wooden crate that leaves a 5 cm cushioning gap on every side, fill that gap with foam or blankets, and brace the piece so it cannot slide.
A serviceable crate has a plywood base, timber battens on the corners and edges, and a lid that screws down rather than nails. Line the interior with thick cardboard so splinters never contact the finish.
For lighter pieces that are already well padded, a double-wall or triple-wall cardboard box with corner protectors may be adequate.
Step 5: Freight vs Parcel Shipping for Furniture
Freight shipping is generally better suited to heavy, oversize, or crated items; parcel service suits small, light pieces that fit standard carrier limits. Freight vs parcel shipping for furniture usually comes down to weight and dimensions, and the crossover point arrives sooner than most people expect.
Parcel carriers impose strict weight caps and add oversize charges once a package exceeds their length-plus-girth limits. Freight services handle pallets, liftgates, and curbside delivery as standard, and consolidated freight can reduce cost when you are not in a hurry.
| Carrier Type | Best For | Watch For |
|---|---|---|
| Parcel service | Small accent pieces under carrier limits | Oversize surcharges, limited insurance |
| Freight service | Heavy, crated, or oversize furniture | Dock access, liftgate fees |
| Moving service | Full households, door-to-door | Highest cost per piece |
| Rented truck | Short regional moves you drive | You carry all the risk |
Liability, Declared Value, and Insurance
The coverage question is worth reviewing alongside the rate. Standard carrier liability is usually limited, often by weight or by a low per-pound cap, so it rarely reflects what a solid wood piece is worth. Declared value is the amount you tell the carrier the shipment is worth, and it is the basis for a claim; third-party shipment insurance is a separate policy you buy to cover the gap.
Delivery Conditions and Access
Freight is not a single service level. Curbside delivery means the driver leaves the pallet at the street or driveway; liftgate service lowers it to the ground when there is no loading dock; inside delivery and white-glove delivery cost more and are worth it for a heavy or high-value piece. Confirm whether the destination has a dock, whether a residential street can take a tractor-trailer, and whether you will need a liftgate, because these accessorial charges are common surprises on the final invoice.
Preparing for a Claim Before Anything Goes Wrong
Claims are won or lost on documentation, and the preparation starts before the truck arrives. Keep the dated photographs and video from Step 1, photograph the loaded pallet and the bill of lading before the driver signs, and note the declared value on the paperwork. On delivery, inspect the crate before signing and write any visible damage on the delivery receipt; a clean signature is treated as confirmation of clean delivery.
Step 6: Measure, Weigh, and Prepare Freight Documents
Record each package's exact length, width, height, and weight, then photograph the loaded pallet before the driver signs for it. Accurate dimensions determine your freight class and rate, and a reclassification at the terminal is an expensive surprise.
Measure the crate at its widest point, including protruding strapping and corner battens. Weigh it on a bathroom scale by weighing yourself first, then yourself holding the package. List every item on the bill of lading, note the declared value, and keep a copy with your photographs.
Step 7: Inspect on Delivery and Handle Claims
Inspect the crate before you sign anything, and note any visible damage on the delivery receipt in writing. A signature without notation is treated as confirmation of clean delivery, which makes a later claim far harder to win.
Unwrap in a dry, climate-controlled room and let the wood acclimatise for a day or two before assembly. Solid timber that has travelled through cold, damp conditions needs time to settle, and forcing joints together too soon is how cracks begin. Photograph any damage exactly as you found it, keep all packaging, and file the claim promptly with your documentation from Step 1.
Shipping solid wood furniture safely is a discipline of layers, documentation, and patience, and the pieces that survive the journey are the ones packed as though the journey will be rough.
Frequently Asked Questions
Can I ship solid wood furniture through standard carriers like UPS or FedEx?
Standard parcel carriers accept smaller solid wood pieces, but most have weight and size limits that rule out large or heavy furniture. A solid wood dining table or dresser usually exceeds those limits, so it needs a freight service instead. If your piece fits parcel limits, double-wall cardboard and plenty of padding are essential because parcels are sorted on automated belts. For anything oversize, compare freight quotes before booking.
What is the best way to protect wood surfaces from scratches during transit?
Start with a soft layer directly against the wood finish, such as foam sheets or clean moving blankets, then add bubble wrap for cushioning. Avoid taping directly to the wood, since adhesive can lift the finish. Wrap corners and legs with extra padding and secure everything with stretch wrap so nothing shifts inside the box or crate. Label the piece fragile and keep it away from metal hardware that could rub during transit.
Is it better to use a freight service or a standard courier for heavy wood furniture?
Freight service suits heavy furniture because it handles pallets, liftgates, and larger dimensions that parcel networks reject. Parcel shipping works for small accent pieces, lamps, or flat-packed items under carrier limits. Confirm whether curbside or inside delivery is included before you book.
How do I crate solid wood furniture for long-distance shipping?
Build a crate from double-wall or triple-wall cardboard, or a wooden frame for very heavy pieces. Pad the furniture with blankets and foam, then brace it inside the crate with cardboard buffers so it cannot move. Leave no gaps that let the piece shift, and mark the crate with arrows and fragile labels. For antique furniture, photograph every surface before sealing so you have evidence if a claim is needed.
